
Table of Contents
Introduction to Fried Chicken Legs Recipe
What Makes Fried Chicken Legs a Favorite?
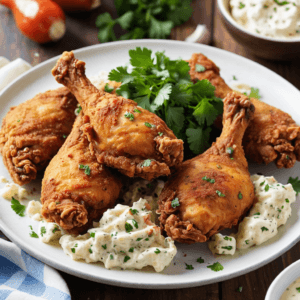
Fried chicken legs recipe are a beloved comfort food, known for their juicy meat, crispy coating, and irresistible flavor. Their natural size and shape make them perfect for handheld enjoyment, and their high meat-to-bone ratio ensures a satisfying bite every time. Whether served as part of a family dinner, a picnic treat, or a game-day snack, fried chicken legs never fail to please.
A Brief History of Fried Chicken
Fried chicken has deep roots in culinary history, blending influences from various cultures. While its origins can be traced back to African and European cooking methods, the dish became a staple in Southern American cuisine. African cooks in the American South perfected the art of frying chicken, seasoning it generously and using lard or oil for a crisp, flavorful crust. Today, fried chicken is celebrated worldwide, with countless variations and techniques.
Why Chicken Legs are Perfect for Frying
Chicken legs are ideal for frying due to their natural structure and composition. The dark meat of the legs is rich and flavorful, staying moist and tender even after frying. Their bone-in structure helps retain heat, ensuring even cooking. Additionally, their size makes them easy to coat and fry evenly, resulting in the perfect balance of juicy interior and crispy exterior. This versatility makes chicken legs a go-to choice for fried chicken lovers everywhere.
Key Ingredients for Fried Chicken Legs
Choosing the Best Chicken Legs
The foundation of perfect fried chicken lies in the quality of the chicken legs. Look for fresh, bone-in, skin-on chicken legs for the juiciest results. Opt for chicken that is free of excess fat and has a consistent size for even cooking. Organic or free-range chicken is a great choice, as it often has better flavor and texture. If frozen chicken legs are used, ensure they are fully thawed before frying to guarantee even cooking.
Essential Seasonings and Spices
The seasoning is what transforms ordinary chicken into a flavorful masterpiece. A classic fried chicken spice blend might include:
- Salt and Pepper: The base for any good seasoning.
- Paprika: Adds color and a smoky undertone.
- Garlic Powder and Onion Powder: Boost savory flavor.
- Cayenne Pepper: For those who like a little heat.
- Dried Herbs: Options like thyme, oregano, or parsley can add depth.
Customize your spice mix to match your taste preferences, but remember to season both the chicken and the coating generously for the best flavor.
The Role of Flour, Buttermilk, and Other Coatings
The coating is what gives fried chicken legs their signature crunch. Here’s how each component contributes:
- Flour: All-purpose flour is the standard base for the coating, creating a golden, crispy crust. Adding a bit of cornstarch to the mix can make the crust even crunchier.
- Buttermilk: Soaking the chicken legs in buttermilk tenderizes the meat and helps the coating adhere better. For extra flavor, add hot sauce or spices to the buttermilk marinade.
- Eggs: Beaten eggs can be used to help bind the coating to the chicken, creating a thicker, more even crust.
- Breadcrumbs or Panko: For a crunchier texture, breadcrumbs or panko can be mixed with the flour.
The combination of these ingredients ensures a flavorful, crispy coating that complements the tender meat of the chicken legs perfectly.
Prepping Chicken Legs for Frying
Cleaning and Trimming Chicken Legs
Properly cleaning and trimming chicken legs is the first step to achieving perfect fried chicken. Follow these tips for preparation:
- Rinse and Pat Dry: Rinse the chicken legs under cold running water to remove any residue or impurities. Pat them dry with paper towels to ensure the coating adheres properly.
- Trim Excess Fat: Use a sharp knife or kitchen shears to trim away excess skin or fat without removing the natural skin layer, as it helps retain moisture and flavor during frying.
- Inspect for Feathers: Check for and remove any remaining pinfeathers or bone fragments that may have been missed during processing.
Marinating: Tips for Maximum Flavor
Marinating the chicken legs is key to infusing flavor and keeping the meat tender. Here’s how to get the most out of your marinade:
- Use Buttermilk: A classic choice for marinating fried chicken, buttermilk tenderizes the meat and helps the coating stick better. Add hot sauce or spices like paprika, garlic powder, and cayenne to the buttermilk for extra flavor.
- Time Matters: Allow the chicken legs to marinate for at least 1–2 hours, or ideally overnight, for maximum flavor absorption.
- Alternative Marinades: If you prefer a different flavor profile, try a yogurt-based marinade with lemon juice and herbs or a soy sauce and ginger marinade for an Asian-inspired twist.
Coating Techniques for Crispier Fried Chicken
The coating is essential for achieving a perfectly crispy crust. Follow these steps for the best results:
- Double Dredge: Dip the marinated chicken legs in seasoned flour, then back into the buttermilk, and finally into the flour again. This double-dredging method creates a thicker, crunchier crust.
- Add Cornstarch: Mix cornstarch with flour for a lighter, extra-crispy coating.
- Use Panko for Texture: For an ultra-crunchy finish, incorporate panko breadcrumbs into the coating mixture.
- Shake Off Excess: After coating each leg, gently shake off any excess flour to ensure an even crust that won’t fall apart during frying.
With these prepping techniques, your chicken legs will be ready to fry up into a flavorful, crispy, and tender dish that’s sure to impress!
Frying Techniques
Choosing the Right Oil for Frying
The type of oil you use significantly impacts the flavor and texture of fried chicken. Here are some tips for selecting the best oil:
- High Smoke Point Oils: Use oils with a high smoke point, such as peanut oil, canola oil, or vegetable oil, to prevent burning and achieve a crispy crust.
- Neutral Flavor: Opt for oils with a neutral taste to let the seasoning and chicken flavor shine.
- Avoid Butter or Olive Oil: These have low smoke points and can impart unwanted flavors or burn during frying.
Peanut oil is often a favorite for fried chicken due to its high smoke point and subtle nutty flavor, though other options like sunflower or soybean oil work well too.
How to Achieve the Perfect Temperature
Maintaining the right frying temperature is critical for crispy, evenly cooked chicken legs. Follow these tips for temperature control:
- Ideal Frying Temperature: Heat the oil to 350°F to 375°F (175°C to 190°C). Too hot, and the coating may burn before the chicken is cooked; too cool, and the chicken will absorb excess oil, resulting in a greasy texture.
- Use a Thermometer: A deep-fry or candy thermometer ensures accurate temperature readings. Monitor the temperature throughout frying to avoid fluctuations.
- Avoid Overcrowding: Fry the chicken legs in small batches to maintain a consistent oil temperature and allow proper circulation for even cooking.
Deep Frying vs. Pan Frying: Pros and Cons
Deep Frying
- Pros:
- Produces evenly cooked, crispy chicken due to full immersion in oil.
- Requires less monitoring during frying once the temperature is stable.
- Cons:
- Uses a large amount of oil, which can be costly and harder to dispose of.
- Requires a deep fryer or large pot.
Pan Frying
- Pros:
- Uses less oil, making it more economical and easier to clean up.
- Can provide a rustic, slightly less uniform crust that some people prefer.
- Cons:
- Requires flipping the chicken legs to ensure even cooking.
- May result in slightly less crispy chicken compared to deep frying.
Both methods can yield excellent results. Choose based on your available equipment and preference for texture and convenience.
By selecting the right oil, maintaining the proper temperature, and using the frying technique that works best for you, you’ll achieve perfectly fried chicken legs every time.
Fried Chicken Legs Recipe: Crispy and Delicious
Ingredients
- 6 pieces Chicken Legs (bone-in, skin-on)
- 2 cups Buttermilk
- 1 1/2 cups All-Purpose Flour
- 1/2 cup Cornstarch
- 2 tsp Paprika
- 1 tsp Garlic Powder
- 1 tsp Cayenne Pepper
- Salt and Pepper To taste
- Cooking Oil
Cooking the Chicken Legs
Step-by-Step Instructions for Frying
- Preheat the Oil: Heat your chosen oil in a deep fryer or heavy-bottomed skillet to 350°F to 375°F (175°C to 190°C). Use enough oil to submerge the chicken legs halfway for pan frying or fully for deep frying.
- Prepare the Chicken: After marinating and coating the chicken legs, let them rest for 5–10 minutes. This allows the coating to adhere better and results in a crispier crust.
- Begin Frying:
- Carefully lower the chicken legs into the hot oil, ensuring not to overcrowd the pot or skillet.
- Fry in small batches to maintain a consistent oil temperature.
- Monitor Cooking Time:
- For deep frying, cook for 10–12 minutes or until the internal temperature of the chicken reaches 165°F (74°C).
- For pan frying, cook each side for 5–7 minutes, flipping once, until golden brown and fully cooked.
- Drain and Rest: Remove the chicken legs from the oil and place them on a wire rack or paper towel-lined plate to drain excess oil. Let them rest for a few minutes before serving to lock in the juices.
How to Avoid Undercooking or Overcooking
- Check Internal Temperature: Use a meat thermometer to ensure the internal temperature of the thickest part of the chicken leg reaches 165°F (74°C).
- Cook Evenly: Flip the chicken in pan frying or rotate pieces in deep frying to prevent uneven cooking.
- Monitor Oil Temperature: If the oil is too hot, the coating will burn while the inside remains raw. Too cool, and the chicken absorbs oil, becoming greasy.
Tips for a Golden-Brown, Crispy Crust
- Proper Coating: Ensure the chicken is evenly coated, with no wet or uncoated spots, to achieve a uniform crust.
- Double Dredge: For an extra crispy crust, dip the chicken in the coating mixture twice, allowing a few minutes of rest between coats.
- Don’t Crowd the Pan: Overcrowding lowers the oil temperature, resulting in soggy, unevenly cooked chicken.
- Add a Touch of Cornstarch: Mixing cornstarch with the flour in the coating adds lightness and crunch to the crust.
By following these steps and tips, you’ll achieve perfectly cooked chicken legs with a golden-brown, crispy crust and juicy, tender meat inside.

Serving Suggestions
Best Side Dishes to Pair with Fried Chicken Legs Recipe
Fried chicken legs are a versatile main course that pairs well with a variety of side dishes. Some classic and crowd-pleasing options include:
- Mashed Potatoes: Creamy and buttery mashed potatoes are a perfect complement.
- Coleslaw: A tangy and crunchy coleslaw balances the richness of fried chicken.
- Cornbread: Sweet and savory cornbread adds a Southern touch.
- Green Beans or Collard Greens: These hearty vegetables provide a nutritious contrast.
Pair fried chicken legs with classic sides like Baked Beans or creamy coleslaw for a complete Southern-inspired meal.
For a sweet finish, serve with the Peach Crumble for a crowd-pleasing combination.
Dipping Sauces to Elevate Your Dish
Pair your fried chicken legs with flavorful dipping sauces to add variety:
- Ranch Dressing: A cool, creamy favorite.
- Honey Mustard: Sweet and tangy for a balanced bite.
- Spicy Buffalo Sauce: For those who enjoy heat.
- BBQ Sauce: Smoky and rich for a classic pairing.
Presentation Tips for a Classic Fried Chicken Dinner
Elevate the presentation of your fried chicken legs with these tips:
- Serve on a Platter: Arrange chicken legs on a rustic wooden board or platter with a garnish of fresh parsley or lemon wedges.
- Add Color: Include colorful sides like coleslaw or roasted vegetables for visual appeal.
- Individual Baskets: For a casual gathering, serve in small baskets lined with parchment paper.
Variations of Fried Chicken Legs
Spicy Fried Chicken Legs
Turn up the heat by adding cayenne pepper, chili powder, or hot sauce to the marinade or coating. For a spicier kick, try coating the chicken in a spicy flour mix before frying or tossing it in buffalo sauce after frying.
Gluten-Free and Low-Carb Options
For a gluten-free version, substitute all-purpose flour with gluten-free flour or almond flour. To make it low-carb, use crushed pork rinds or Parmesan cheese as a coating for a crispy, carb-free crust.
Oven-Fried Chicken Legs for a Healthier Twist
For a lighter alternative, try oven-frying:
- Coat the chicken with seasoned breadcrumbs or panko and lightly spray with oil.
- Bake at 400°F (200°C) for 35–40 minutes, flipping halfway, until golden brown and crispy.
Health and Nutrition Tips
Nutritional Profile of Chicken Legs
Chicken legs are a great source of protein and essential vitamins like B6 and B12. They also contain zinc and iron, vital for energy and immune support. However, the skin and frying process can increase fat and calorie content, so enjoy in moderation.
Healthier Alternatives for Deep-Frying
- Air Fryer: Cook chicken legs in an air fryer for similar crispiness with much less oil.
- Oven-Frying: Baking with a light spray of oil reduces fat while still delivering a crunchy texture.
Portion Control and Balanced Meals
Stick to 1–2 chicken legs per person and pair with healthy sides like steamed vegetables or a fresh salad to create a balanced meal. Limit heavy, carb-laden sides if you’re watching your calorie intake.
Storing and Reheating Fried Chicken Legs
Proper Storage to Maintain Freshness
- Refrigeration: Store fried chicken legs in an airtight container in the refrigerator for up to 3–4 days.
- Freezing: Wrap individual pieces in foil or plastic wrap, then place them in a freezer-safe bag. They can be frozen for up to 3 months.
Tips for Reheating Without Losing Crunch
- Oven Method: Preheat the oven to 375°F (190°C). Place the chicken legs on a wire rack over a baking sheet and heat for 10–15 minutes until warmed through.
- Air Fryer: Reheat in an air fryer at 350°F (175°C) for 5–7 minutes to regain crispiness.
- Avoid Microwaving: Microwaving can make the crust soggy, so it’s best to use an oven or air fryer for reheating.
Reheat in an oven or air fryer to regain crispiness. Avoid microwaving, as it can make the crust soggy. For detailed reheating tips, check out the Easy Chicken Pot Pie Recipe.
Can You Freeze Fried Chicken Legs?
Yes, you can freeze fried chicken legs, and it’s a great way to preserve leftovers for future meals. Here’s how to freeze them properly:
Steps for Freezing Fried Chicken Legs
- Cool Completely: Allow the fried chicken legs to cool completely to prevent condensation and sogginess in the freezer.
- Wrap Individually: Wrap each chicken leg tightly in aluminum foil or plastic wrap to preserve freshness and prevent freezer burn.
- Store in a Freezer Bag: Place the wrapped chicken legs in a resealable freezer-safe bag or airtight container. Label it with the date for easy tracking.
- Freeze: Store in the freezer for up to 3 months.
Pairing Suggestions
Enhance your Fried Chicken Legs meal with these complementary dishes from Titan Recipes:
- Serve it with crispy Potato Pavé Recipe: Elegant Layers with Tips & Variations for a gourmet twist on a classic meal.
- Pair it with a bowl of Swamp Soup Recipe: A Hearty and Nutritious Delight for a cozy and satisfying combination.
- Enjoy it alongside Fried Squash Recipe: Easy Southern-Style Delight for a complete Southern-inspired feast.
Common Questions About Fried Chicken Legs
How long does a chicken leg take to fry?
Chicken legs typically take 10–12 minutes to fry in hot oil at 350°F to 375°F (175°C to 190°C). For pan frying, cook each side for about 5–7 minutes, flipping once. Always check the internal temperature with a meat thermometer to ensure it reaches 165°F (74°C).
What is the secret to good fried chicken?
The secret to excellent fried chicken lies in these key elements:
- Marination: Soak the chicken in buttermilk or a seasoned marinade to tenderize and infuse flavor.
- Coating: A well-seasoned flour mixture or breading is crucial for a flavorful crust.
- Oil Temperature: Maintain a steady frying temperature of 350°F to 375°F for even cooking and crispiness.
- Rest Time: Let the chicken rest after coating to allow the breading to adhere properly.
Do you use cornstarch or flour to fry chicken?
You can use either, but a combination of flour and cornstarch often yields the best results:
- Flour: Provides structure and a golden-brown crust.
- Cornstarch: Adds a light, crispy texture. Mixing cornstarch with flour in a 50/50 ratio is a popular choice for achieving the perfect crust.
How do you fry drumsticks without burning them?
To avoid burning drumsticks:
- Monitor Oil Temperature: Keep the oil at a consistent 350°F to 375°F. Overheated oil can cause the coating to burn before the chicken cooks through.
- Don’t Overcrowd: Fry in small batches to maintain even heat.
- Flip Frequently: For pan frying, turn the drumsticks every few minutes to prevent over-browning on one side.
- Use Proper Equipment: A heavy-bottomed skillet or deep fryer ensures even heat distribution.
Should you let chicken sit in flour before frying?
Yes, letting the chicken sit in the flour coating before frying is recommended. Resting the coated chicken for about 10–15 minutes allows the flour to absorb moisture from the chicken or marinade, helping the coating adhere better. This step also results in a crispier crust.
What is the trick to getting crispy chicken?
The key to achieving crispy fried chicken includes:
- Double Coating: Dredge the chicken twice in flour or breading for an extra-thick, crunchy crust.
- Cornstarch Mix: Incorporate cornstarch into the coating for a lighter, crispier texture.
- Maintain Oil Temperature: Keep the oil hot and consistent to ensure the coating fries properly without becoming soggy.
- Drain Properly: Place fried chicken on a wire rack instead of paper towels to avoid trapping steam and moisture.
By following these tips, you’ll master the art of frying chicken legs with a golden-brown, crispy crust and tender, juicy meat inside!
Making Fried Chicken Legs for Special Occasions
Adjusting the Recipe for Large Gatherings
Fried chicken legs are a crowd-pleaser, and scaling up the recipe for large gatherings is simple:
- Batch Cooking: Fry the chicken in smaller batches to maintain consistent oil temperature. Keep cooked chicken warm in a low oven (200°F/90°C) until all batches are ready.
- Prep Ahead: Marinate the chicken and prepare the coating in advance to streamline the frying process.
- Portion Planning: Plan for 1–2 chicken legs per person, depending on the size of your crowd and accompanying dishes.
Creative Plating Ideas for Parties
Impress your guests with thoughtful presentation:
- Rustic Platters: Serve fried chicken legs on wooden boards with bowls of dipping sauces and sides like cornbread and coleslaw.
- Individual Servings: Use mini baskets or paper-lined trays for a casual and fun vibe.
- Garnish: Add fresh herbs, lemon wedges, or a sprinkle of paprika to elevate the visual appeal.
Customizing Flavors for Themed Dinners
Take your fried chicken legs to the next level by incorporating flavors that suit the occasion:
- Spicy Cajun: Add Cajun spices like cayenne, paprika, and thyme to the marinade and coating.
- Asian-Inspired: Use a soy-ginger marinade and serve with sesame dipping sauce.
- Mediterranean Twist: Infuse the chicken with lemon, oregano, and garlic flavors, and pair with tzatziki.
Experimenting with seasonings and sides allows you to customize your fried chicken for any theme or event.
Conclusion
Why Fried Chicken Legs Are a Must-Try Dish
Fried chicken legs are the ultimate comfort food—crispy, juicy, and full of flavor. They’re versatile, easy to prepare, and loved by people of all ages, making them perfect for weeknight meals, parties, and everything in between.
Encouragement to Experiment with Techniques
Whether you’re a seasoned cook or a beginner, fried chicken legs offer endless opportunities for creativity. Try different marinades, coatings, and frying methods to discover your perfect recipe. Don’t be afraid to experiment with flavors and techniques to make the dish truly your own.
Final Thoughts and Tips for Success
- Use fresh, high-quality chicken legs for the best results.
- Maintain a consistent oil temperature to achieve a golden, crispy crust.
- Let the coated chicken rest before frying to ensure the breading adheres well.
Share Your Creations
We’d love to see your fried chicken leg creations! Share your photos and feedback on social media, and tag us to inspire other home cooks. Let’s celebrate the joy of cooking together, one crispy bite at a time!